How to make a candle in a silicone mold
Making candles in silicone moulds is easy and fun. Just choose the shape, wax and wick, and within a few hours you can have a beautiful candle ready exactly to your liking. Silicone moulds are ideal for original shapes. The candle is easy to remove from them without damaging them.

##MEDAILONEK_EN_001##
Candle making process
- Mold preparation
Prepare the mold and make sure the mold is clean and dry. The silicone does not need any special treatment.
With an awl, pierce the centre of the silicone mould and thread the wick through so that it overlaps the mould on both sides. Secure the wick with a wick holder on the top side from which you will be pouring the wax. It must be taut and stable so that the candle burns evenly. - Heating the mold (recommended)
The mold can be slightly lukewarm/warm so that the wax doesn't rot too quickly at the walls and form rings. Just heat it briefly with warm air from a hair dryer or heat gun. - Wax preparation
Heat the wax to the recommended temperature (usually 55-65°C) and slowly pour it into the mould. Pour over the side of the mold to minimize bubbles and spots. If the mould is jagged make sure there is no unwanted bubble trapped anywhere and that the wax has indeed flowed everywhere.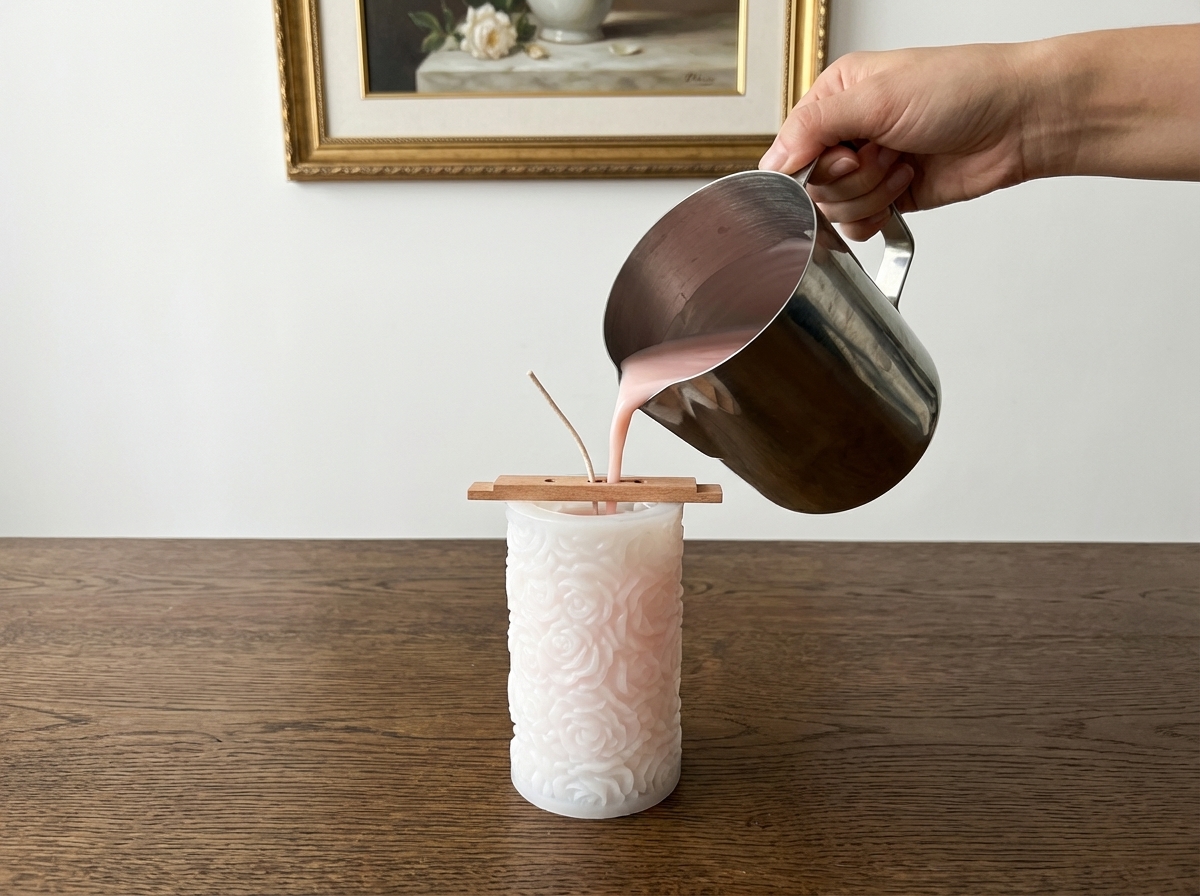
💡If you don't know how much wax you need, check out our moulds. We have the consumption listed with them. 😊 Do you have another mould? Pour your wax granules into it. Then multiply the weight by 1.7 to get an approximate consumption. We prefer to melt 2x the amount of wax due to the fact that some molds are more rugged, a little bit remains in the melting pot, etc. - Coloring the wax and adding scent
Color and scent are added after the wax is melted. We recommend about 40 drops of fragrance for a delicate scent per 100 grams of wax. Add colouring in the amount as per the instructions. Add it gradually and stir until you are satisfied with the shade.
Remember that the natural color of the wax will affect the final shade. If the wax is soy wax and white in the solid state, its white color will mute the added colors. - Stilling the candle
Let the candle cool at room temperature. Do not attempt to remove it too soon to avoid deforming it. Do not hasten solidification by placing it in a cold environment. The wax would then be brittle and improper curing could affect the quality of the candle's burn. - Finishing the candle
After the candle is completely solidified, carefully remove the mold. Shorten the wick to about 0,5-1 cm and the candle is ready for the first burning. It is recommended to let the candle rest for 24 hours before lighting it.

First burning of the candle
The first lighting of a candle is crucial to its continued proper burning. Allow the candle to burn long enough to melt the wax all the way down to the sides of the container. This will prevent tunneling and uneven burning.
Recommended first burn time is approximately 1 hour for every 2-3 cm of candle diameter, but no more than 3-4 hours at a time.
Shorten the wick to approximately 0.5-1 cm before each subsequent lighting. A properly done first burn significantly extends the life of the candle and ensures an even and safe burn.